Growing Camellias: How To Propagate Camellias

How to grow camellias is one thing; how to propagate them is another. Propagation of camellias is usually accomplished through seeds, cuttings or layering, and grafting. While taking cuttings or layering is the easiest and most preferred method, many people are still interested in how to grow camellias from seed.
Growing Camellias
Camellias usually grow best in partially shaded areas in well-drained soil. Although planting can take place at any time, fall is more favorable, as the roots have more time to establish themselves.
Camellias require frequent watering once planted, eventually shortening to about once a week once plants are established. A generous layer of organic mulch will help retain moisture and keep down weeds. Pruning of camellia is usually not necessary but may be performed in spring for appearance.

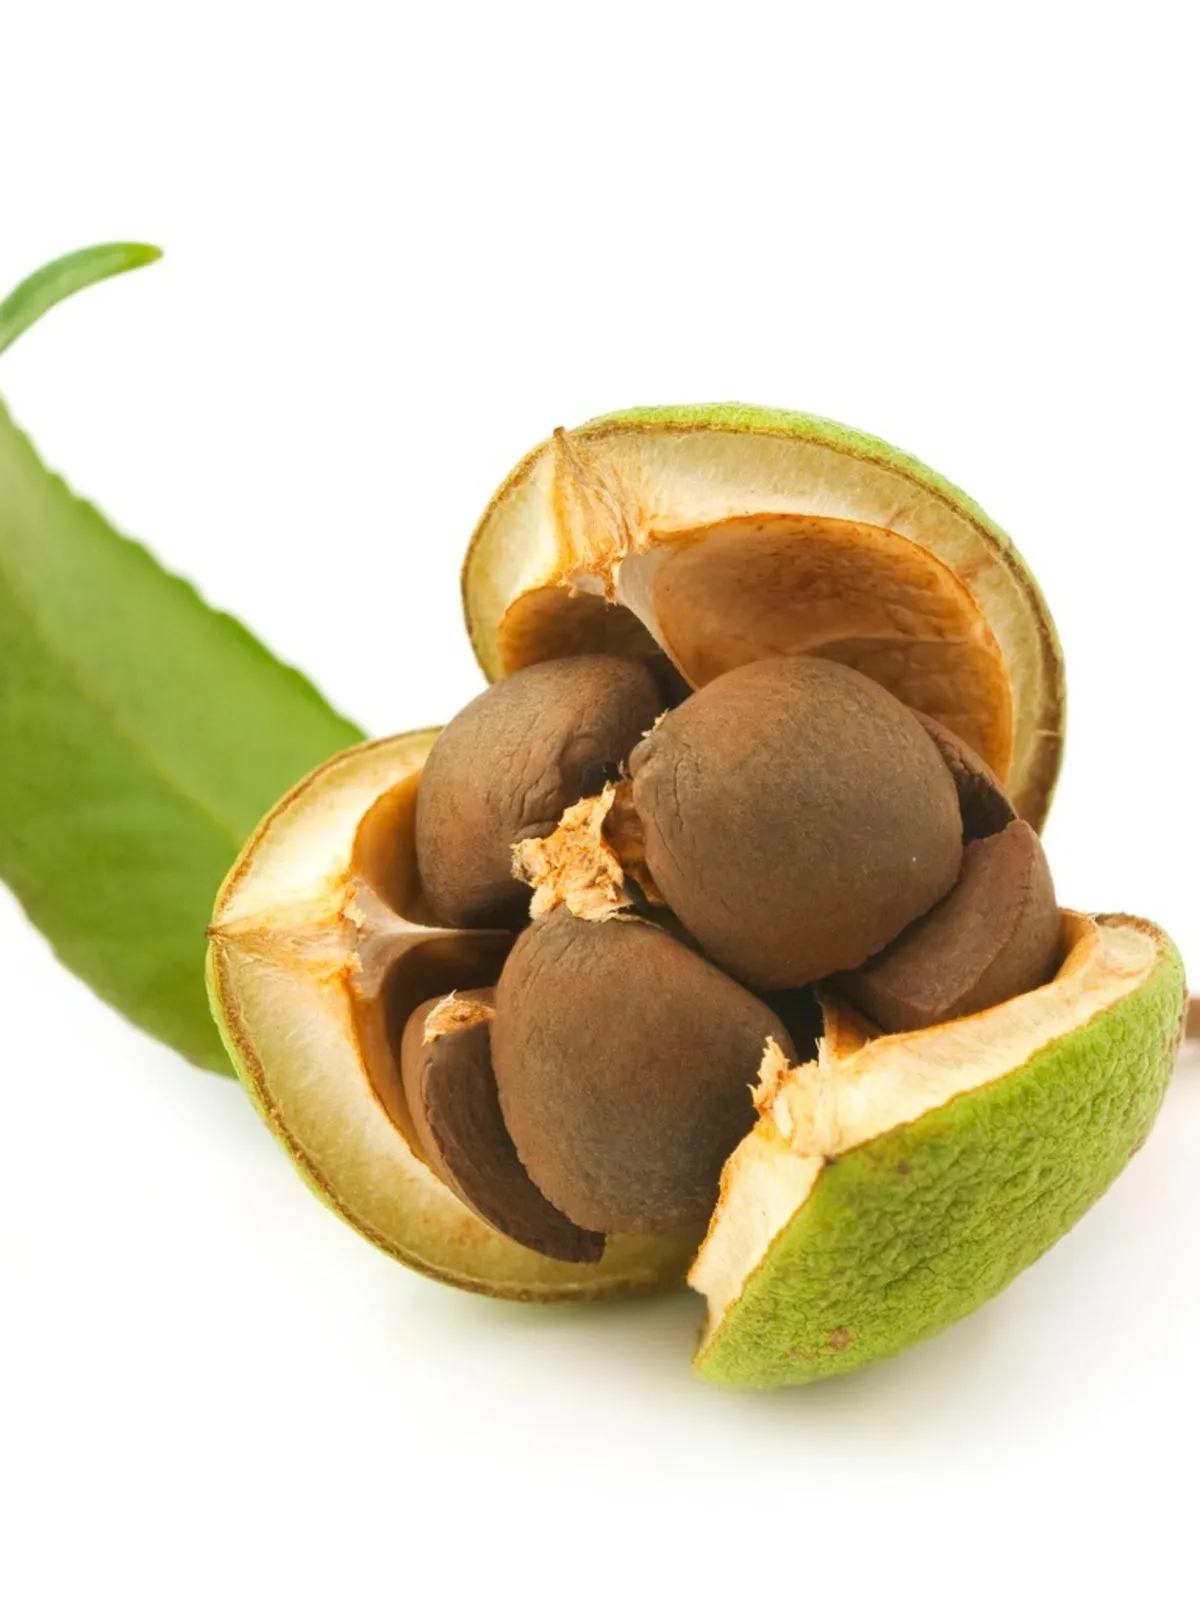
How to Grow Camellias from Seed
Growing camellias from seed is much slower than other propagation methods, taking many years to bloom, if at all. Camellia fruit or seeds ripen at various times depending on their location and variety. Most, however, are ready to harvest in fall. Mature camellia seedpods turn brown and crack open.
Once this occurs, collect the mature camellia seedpods and soak the seeds for about twelve hours prior to planting. Do not allow camellia fruit (seeds) to dry out. They should be planted as soon as possible. Seeds can be germinated faster by placing them in a plastic bag and covered with sphagnum moss, which should be misted until moist.
They will usually germinate within a month or so, at which time you should notice small taproots. Prior to planting these in pots, snip off some of the taproots.
Continue to keep them moist when planted and place the pots in a warm location with bright, indirect light.
Additional Propagation Methods
An alternative to growing camellias from seed is by taking cuttings or layering. This usually ensures an identical plant and the waiting time for plants is not as long.
This process is best done during summer. Make an angled cut on the stem or branch and dip it into rooting hormone. Bend the branch over to place in the soil. Secure with a rock or wire and allow to remain in the ground one season or until significant rooting occurs.
Then clip away from the parent and plant as usual. Grafting is a bit more complicated, requiring slightly more skill than the average gardener may have. Therefore, layering is preferable.
