Turf Bench Info: How To Make A Turf Seat For Your Garden
What is a turf bench? Basically, it’s exactly what it sounds like – a rustic garden bench covered with grass or other low-growing, mat-forming plants. According to the history of turf benches, these unique structures were distinctive features in medieval gardens where they provided seating for proper lords and ladies.
Turf Bench Info
Turf benches began with a frame constructed of various materials such as wood, stone, brick, or woven reeds, twigs, and branches. According to turf bench information, the benches were often simple rectangles, although fancier turf benches could be curved or circular.
Trellises or arbors were often added to turf seats, adorned with climbing roses or other vining plants. Turf benches were placed strategically around the circumference of a garden, or as a focal point in the center.

Interested in making a turf bench? It isn’t difficult to construct a turf seat, but plan ahead; you won’t be able to use the bench right away. Read on for more turf bench info.
How to Make a Turf Seat
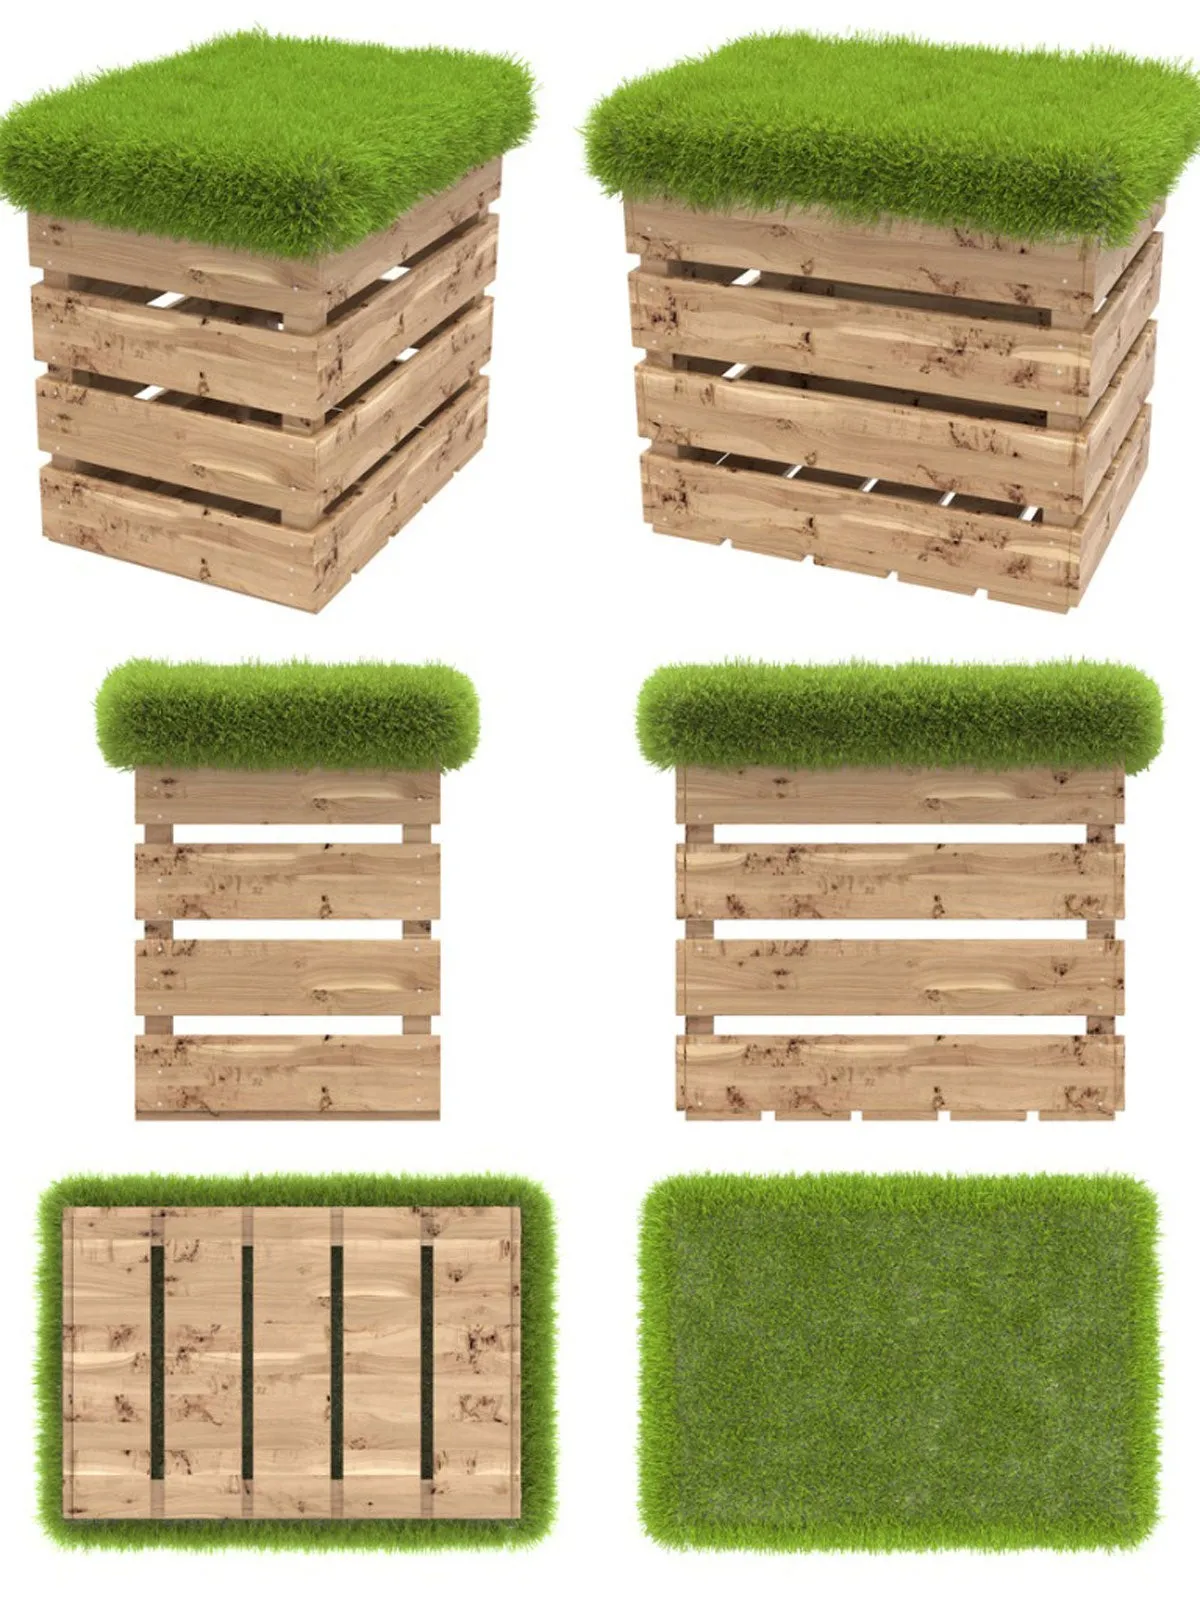
There are a number of ways to make your own turf bench – just use your imagination and what you have on hand and experiment. For instance, crafting one from an old pallet is one idea. That said, here is a basic plan for making a grass covered bench for your garden.
- Construct a rectangular frame with wood, stone, or brick. The typical size of a simple turf bench is about 36 by 24 by 24 inches (91 cm. x 61 cm. x 61 cm.).
- Build the frame in a sunny spot with a dependable water source; once the bench is completed, it can’t be moved.
- If you want to try making a turf seat of woven branches and twigs, use something pliable like witch hazel or willow. Drive wooden stakes into the ground about a foot (31 cm.) apart. Soak the branches to soften them, then weave the branches and twigs between the stakes and secure them with nails. Keep in mind that the frame must be solid enough to hold soil.
- Line the structure with plastic, then place about 4 inches (10 cm.) of gravel or stone in the bottom. Fill the bench to the top with soil, watering lightly as you work, then level the surface.
- Continue to water lightly and tamp until the soil is firm. Once you’re sure the soil is sturdy and well compacted, you can carefully remove the framing.
- The bench is now ready for you to plant grass on the top (and sides, if you want). The easiest way to accomplish this is usually by planting small squares or strips of sod, although you can also plant grass seeds. Sprinkle a little fertilizer on the soil before planting to get the grass off to a good start.
Don’t use the bench until the grass is well established, usually in a few weeks.
